3 Filters You Need Now!
In the digital age, you can “fake” almost anything in post production, including the effects of filters, but using a filter on-camera will give you better results, and make you a better photographer. Here’s what you need to know:
We may earn revenue from the products available on this page and participate in affiliate programs. Learn more ›
What filter to use and when—explained.
In the digital age, you can “fake” almost anything in post production, including the effects of filters, but using a filter on-camera will give you better results, and make you a better photographer. Here’s what you need to know:
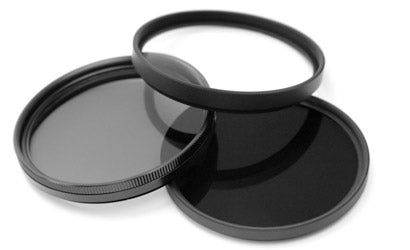
The basic types of filters are: UV/Daylight Filters, Polarizing Filters, and Neutral Density /Graduated Neutral Density Filters.
UV/Daylight filter. The most beneficial thing a UV/Daylight filter does is protect your lens from scratches. Generally, a UV filter requires no exposure compensation since it’s clear.
Polarizing Filter. One of the most popular filters, a polarizing filter works like a pair of sunglasses for your lens. It adds saturation to your colors, especially blues, and cuts through reflections from water and bright white objects. Look for a circular polarizing filter that screws right onto the front element of your lens, the filter has an outer ring that turns, giving you different results depending on how it is lined up with the sun. A mark on the outside of the filter helps you to line it up with the sun giving you the most benefits. You can always saturate your colors in your images in post processing but being able to cut through a reflection from a body of water and see what is under the water, can not be replicated with software. Cutting the bright glare from white objects is also an advantage you get from a polarizing filter that is hard to duplicate with software.
**
Neutral Density and Graduated Neutral Density** filters are basic filters used by landscape photographers. A neutral density filter is grey and comes in different strengths allowing you to make images during the day with longer exposures so you can capture things like a flowing waterfall in bright daylight. You can stack different densities of neutral density filters to get different effects. A variation on the neutral density filter is the graduated neutral density filter. As its name suggests the graduated neutral density filter gradually goes from dark to clear.
The transition from dark to clear comes in either a gradual transition referred to as a smooth edge or a very stark dark to clear transition referred to as hard edge. With half of the filter being dark and the other half being clear, a graduated neutral density is the perfect solution for those situations where the foreground and background need different exposures to capture the image as our eyes see it. A light sky and a dark foreground will be exposed properly with a graduated neutral density filter allowing the photographer to expose properly for the dark foreground without blowing out the highlights of the lighter sky.
—Melissa Macatee
Contributing Blogger