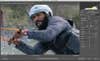
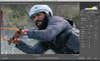
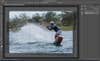
Before: This wakeboarder was backlit and moving fast, making exposure a challenge. But even ACR’s most basic tools can bring out lost detail and render the picture usable. Theano NikitasAfter Theano Nikitas
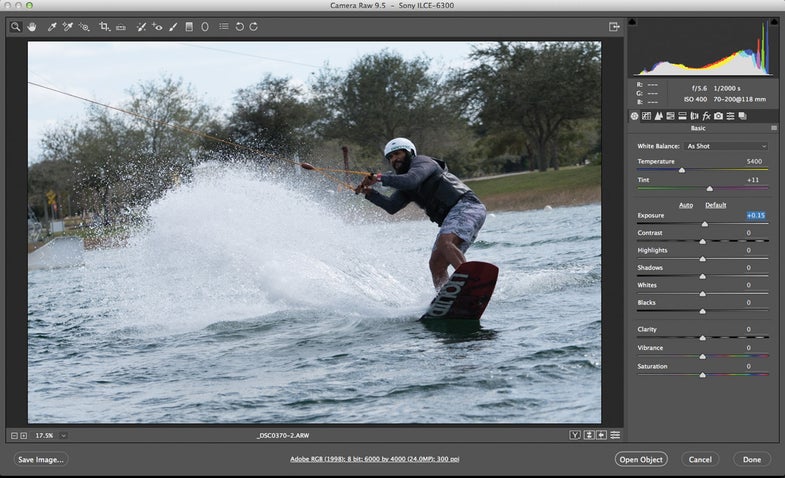
By now, you’re probably at least partially familiar with Adobe Camera Raw, but It’s always a good time to go over some of the basics of using this powerful program. Explore some of the more advanced features in ACR by clicking on the different tabs but, for now, we’re going to take a look at the quick and easy (and powerful) adjustments you can make in the Basics tab.
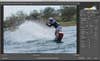
Pop Photo’s senior technology editor Philip Ryan took this action shot of a wakeboarder with the new and speedy Sony A6300. While he captured a great moment, the contrast between the bright mega-wake of water and the backlit athlete’s face required some finessing. While you might be able to tweak the image in Adobe Photoshop proper, using Camera Raw provides a range of tools to more easily—and effectively—balance the extreme highlights and shadows in this photo.
Here, we’ll show you how to work through some of the basic sliders to turn a not-so-great exposure into an image you’d be proud to share.
Step 1: Open your RAW (or JPEG) image in Adobe Camera Raw. Click on the first icon to access the Basic features (they are likely visible by default). Begin by using the Exposure slider to adjust the overall image’s lightness and darkness. I tweaked the exposure only slightly (+0.15 to lighten the overall image) because I wanted to concentrate on more targeted adjustments later. I left the white balance as shot, but you may want to tweak the white balance using the slider or the drop down menu. Theano NikitasStep 2: Since the subject’s face—a critical component of the image—is in shadow, I used the pop-up menu in the lower left of the screen to zoom in on his face and upper body to get a closer look. I then moved the shadows slider to the right (+71) to brighten until his features were more visible. Likewise, you can move the shadows slider to the left to increase shadows in your image. Either way, double-click on the slider’s triangle to reset to zero if these adjustments don’t work for your image. Theano NikitasStep 3: The previous step also lightened the wakeboarder’s shirt and vest. Counteract that adjustment slightly by moving the blacks slider to the left (to about –10) to bring back some richness to the shadows. If you want to see the overall effect of previous steps, zoom out to “fit in view” in the zoom menu. Theano NikitasStep 4: The spray created by the boarder is too bright in relation to the rest of the image—and it lacks detail. To darken the water slightly, I dialed the Highlights slider down to –29. Then, to avoid extensive clipping in the brightest water areas, I also moved the Whites slider to the left, all the way to –59. I increased the contrast slightly to +25 to help bring out some additional details in the water. Theano NikitasStep 5: Although adding a little contrast increases some details in the water, I tweaked the Clarity slider to +18 to help define details. Clarity adds local contrast along edges—particularly in midtones—but it added a slight sharpening effect to all the water in the image. A small increase to Vibrance (+6) and Saturation (+6) added just a little more pop to the photo. To do further tweaking in Photoshop but to keep a copy of your unprocessed file in your folder, hold down the Option key and click Open Copy. Theano NikitasFinal Step: To straighten the image in Photoshop, click on the Crop tool, move the cursor to a corner of the image until it becomes curved, then drag up or down to rotate. Click the check mark at the top of the screen to apply. To remove extraneous objects, such as the wire at the very top of the image, use the Lasso tool to loosely select the object to be removed. Then go to Edit > Fill, choose Content Aware in Contents field and click OK. Repeat as needed. When finished, save your work. Theano Nikitas