Software Workshop: Six Tips For Editing Raw Photos
How to use Adobe Camera Raw's best new features
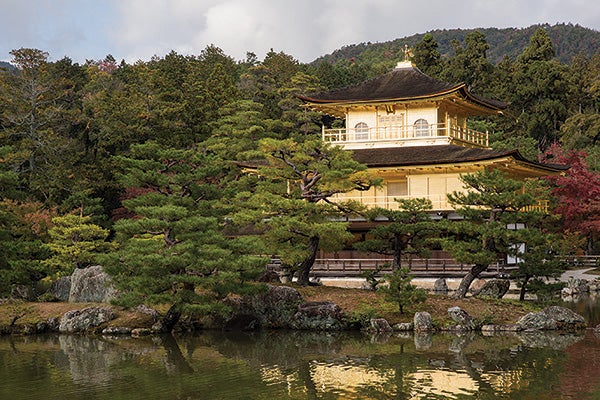

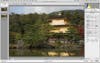
Creative Cloud’s ACR has all kinds of cool features; we used the interactive histogram to fix this photos’s exposure.
If you have Adobe Photoshop, you already have a great RAW converter on your hands in the form of Adobe Camera Raw. Because it maintains feature parity with Lightroom, its new tools keep piling up. But because its interface hasn’t had an overhaul in a long time, you may not know a lot of them are there, and even if you do, you may have some trouble locating them.
Getting familiar with the intricacies of ACR can be especially important if you don’t like the RAW software that came with your camera (or if it didn’t come with any). And it can be even more important if you don’t use an application like Lightroom, Phase One Capture One Pro/Express, or Apple Aperture to organize and process your RAW files. So follow along to make sure you’re getting the most out of Photoshop CC’s version of this stalwart converter. Even if you use it all the time, you’ll likely pick up something helpful.
Tip 1
If you double-click on a RAW file in Bridge, the program will, by default, run ACR within Photoshop. To avoid opening that app if it isn’t necessary (or tying it up if you need to work on another image), run ACR through Bridge. Go to Bridge’s Preferences, then check the box for Double-Click Edits Camera Raw Settings in Bridge. Click OK. If you prefer to open RAW files in Bridge only on demand, you can highlight your file or files and then type Ctrl (Command) + R.
Tip 2

In Creative Cloud, you’ll no longer find resolution options under the Crop tool. Instead—and even better—you can create custom presets for output. Directly below your image you’ll see a summary of the settings by which your image will be processed when you open it or save it. Click on these, your Workflow Options, to adjust.** To make a preset for web sharing, for example, set your Color Space to sRGB, and choose an appropriately small Image Size.** You can adjust Output Sharpening here, too. When back in ACR, right-click or Ctrl+click on the Workflow Options to choose the preset you need.
Print Preview: Now you can soft proof via ACR. In Workflow Options, set a paper profile and intent under Color Space.
Tip 3

One of ACR’s fun (and useful) features in CC is the interactive histogram. Instead of guessing which slider represents which range of tones, you can just click and drag on the histogram itself. Grab the midtones and drag them right to brighten your image; its respective slider will move accordingly. If necessary, do the same with Shadows, Highlights, Whites, and Blacks.
Tip 4
Spot removal was never one of Camera Raw’s strong suits—if you had something long, like a telephone wire, to remove, you had to keep adding spots. But now you can paint on spot removal. Type B to access the tool, or just find it in the toolbar. Use the left and right bracket keys to shrink or expand your brush to a size slightly larger than what you want to remove, and paint the offending area out. Note that the tool’s options now include Feather; use this slider to fine-tune your brush edge. Type B again to exit the tool.
Tip 5

To reduce color noise in a new way, head to the Detail panel. Zoom in to 100%. After you make your adjustments for Luminance and Color noise reduction, minimize the colored patchiness that sometimes occurs in areas where there should be smooth tone. Move the new Color Smoothness slider to the right. If it desaturates too much, pull it back to the left until the effect is just barely noticeable.
Tip 6
The Radial Filter is a quick way to focus an adjustment on a specific circular or oval-shaped area. This can be useful when you want to add a vignette but don’t want it centered, or as a shortcut when you don’t need to paint on your selective adjustment. Get it by typing J. Use the crosshairs to draw a circle around the area you want to affect, and move the central red dot to reposition if necessary. Adjust your feathering (or make any other adjustment you’d like), and choose whether you want the Effect to happen inside or outside the circle.