Software Workshop: Simulate Film with Alien Skin Exposure 5
Try this plugin for quick, editable transformations
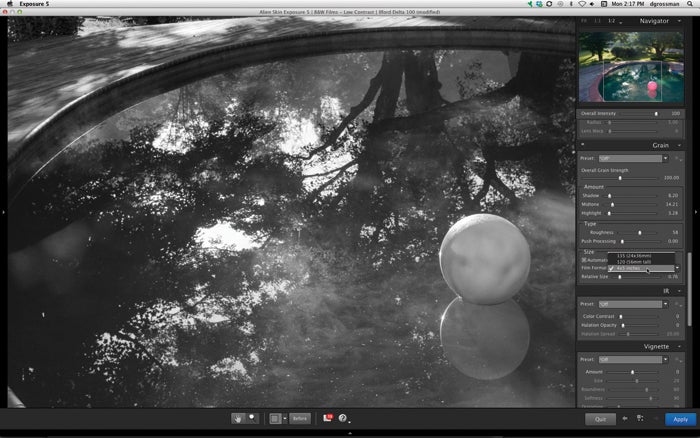
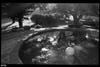
Photo By: Debbie Grossman
Alien Skin Exposure 5 is a great plug-in for adding film and film-like effects to your images. As serious software, it’s more than just filters. It starts with a huge array of presets, both black-and-white and color, to transform your photograph according to preset film types and processes. There are archaic ones like calotype, cinematic ones like Polapan, and more recent (discontinued) favorites like Kodachrome.
The software can be used as a standalone or as a plug-in for Adobe Photoshop, Photoshop Lightroom, and Apple Aperture, and works essentially the same way no matter what program you use to open it. This article demonstrates it using Lightroom 5. Note that if you start with a RAW file in Lightroom, your finished file will land back in Lightroom not as a RAW but as the file type you select under the External Editing tab in Lightroom’s Preferences. In this case, we’ll process it as a TIFF.
Step 1
Make your adjustments in Lightroom first. This one is a bit overexposed in the highlights and needs a little bit more detail in the shadows. (Even if you plan to go for a high-contrast look using Exposure, it’s good to have a wide range of tones in the image for maximum editing leeway.) Then right click on the image to bring out the pop-up menu, and choose Edit In > Exposure 5. In the menu that appears next, choose Edit a Copy with Lightroom Adjustments, and, if necessary, adjust the Copy File Options according to your preference.
Step 2
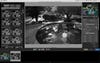
When Exposure 5 opens, you’ll see a very long list of presets at left. You can enlarge the window to see bigger previews of each, or click through them to see how each affects your image writ large in the main window. To narrow down your preset options, click a button to choose a category or try a search. Since this was shot in decent light, type 100 in the search box to pull up options for a film at ASA 100. Then choose your favorite; Ilford Delta 100 works well with this image.
Step 3
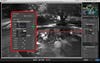
Click the small triangles on the left and bottom panels to minimize them; this will give you the maximum size preview as you make subsequent adjustments. In the panel on the right, much like in Lightroom, begin at the top and work your way down. Use the pulldown menu under Color Filter to add a green filter, which brings out the mist on the pool’s surface. Keep Preserve Luminosity checked to avoid darkening your image.
Filter Adjustments
You can fine tune the density and color of the filter you add, or just tweak it using the Cool/Warm slider.
Step 4
Head down to the Tone Curve to make a fine adjustment to contrast. Use one of the presets from the pulldown, adjust the curve directly, or use the slider to add a bit more contrast to the scene. Then zoom in to adjust the grain. You can individually choose the amount to add to the shadows, midtones, and highlights. And, best of all, you can tailor the grain size to your simulated film. If you plan to crop to a 4×5 ratio, or if you just prefer smaller grain, call your image large format and set the grain size accordingly (it will appear smaller the larger the film size you choose).
Step 5
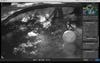
Scroll down to Borders & Textures and check the box to add one. Choose the basic black border for this image so as not to get in the way of the photograph. There are some crepuscular rays already, but emphasize the dreamy light by adding more. Check the box for Light Effects, then scroll through until you find the High Sun Flare. Lower its opacity so that it doesn’t totally wash out the trees at the top of the image. When you’re finished, click Apply to process your image and head back to Lightroom.
Adding Borders and Textures
There are so many options here that it makes sense to search by category. After adding one, use the fine controls to change its size and orientation.
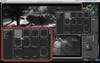
Bonus Step
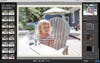
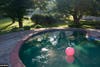
Exposure 5 also does great things with color and can simulate all kinds of vintage color films, too. Here’s a contemporary DSLR portrait made over to look like a 1960s snapshot. We used the Kodachrome II preset plus a print border and, under Dust & Scratches, chose a paper texture for more realism.