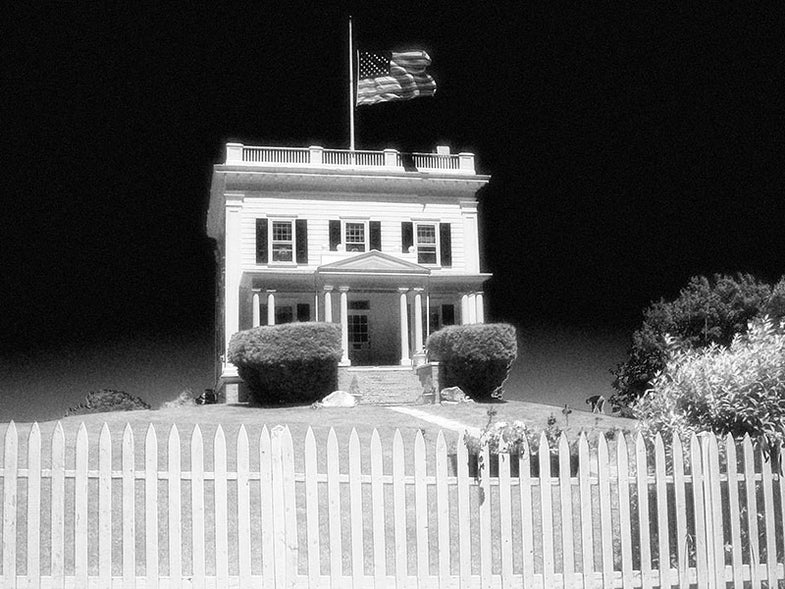
How To: Simulate Infrared Photography Using Photoshop
No film or filters required

We photographers think we see everything; we’re alert and watchful, we record what everyone else misses. But even the most sharp-eyed of us can’t see infrared radiation (those unable to leap tall buildings in a single bound, that is). Certain films capture infrared, and it can add an air of menace to a stark architectural picture, spookiness to a shot of a lone figure, or a touch of ethereal romance to an outdoor portrait, with all the trees and grass taking on a heavenly glow.
Unfortunately, infrared films are tricky. You need an opaque or red filter to achieve that weird, ghostly efface, and with some films, you need a changing bag or darkroom to load film away from stray infrared rays that will expose it. (And, of course, many of us don’t use film cameras in the first place.)
You can digitally simulate the look of an image shot on infrared-sensitve film but, since you’ll be converting from an image that was shot in the visible spectrum, your simulation won’t be perfect. Chlorophyll reflects infrared radiation, so foliage glows light gray in the era real thing. If you’ve got a picture with lots of sun on the grass and trees, you’ll have more luck mimicking the effect. Ironically, digital infrared conversions can work best on pictures that are iffy originals: pictures shot in midday with lots of harsh light work well, and a little blur isn’t a problem either because infrared images are naturally somewhat fuzzy.
Warning: This tutorial involves the use of the Adobe Photoshop Channel Mixer. You can do this project in only a few steps. I promise it will be easy.
STEP ONE: PICK YOUR PIC
**

**
Open it, and make a duplicate layer by going to Layer > Duplicate Layer. Name it “Infrared,” and click OK.
STEP TWO: OPEN THE CHANNEL
**

**
With your “Infrared” layer selected, go to Layer > New Adjustment Layer > Channel Mixer, and click OK in the box. This will open the Channel Mixer windows, and add the infrared effect as an adjustment layer. (An adjustment layer acts as a veil over the layers below, and does not modify any of your pixels directly.)
STEP THREE: MIX MASTER
**

**
We’re making a black-and-white infrared image, so check the “monochrome” box. Since infrared film detects healthy, reflective vegetation (i.e., all the green stuff), it shows up super-bright. Slide the Green channel all the way to the right to pump that channel to 200%. Kill the Blue, by moving its slider left at -200%. You can make further adjustments with the Red channel but leave it at 100% on your first attempt:
Tip: use the Channel Mixer the same way, abet much more subtly, to do controlled conversion to black-and-white.
STEP FOUR: GET THAT GLOW
**

**
The edges in infrared images seem to gloss with an eerie inner light. Get the effect with a quick transformation and some blur. Make sure all your layers are visible, and go to the Layer > Merge Visible to make them one. Duplicate “Infrared,” zoom out so you can see your entire image, and enlarge the window that contains it so you’ve got some gray border. Go to Edit > Free Transform and pull each side out to expand your image all around. Change the Blending Mode of that layer to Screen, and go to Filter > Blur > Gaussian Blur. Adjust the radius and watch your preview until you like what you see. If the glow’s still too much (choosing the Blending Mode Screen should probably brighten things), adjust the Opacity down until it’s perfect.
STEP FIVE: GRAIN ELEVATOR
**

**
Many infrared films are rather grainy; add some for extra authenticity. Do so with Filter > Noise > Add Noise. Add as much as you like according to the preview; choose Gaussian distribution and don’t forget to check monochromatic.
Since this process doesn’t work on all pictures, try recording your stpes and making ourself an Action in Photoshop. That way you can run off infrared conversions faster than a speeding bullet, see which images work, then go back and tweak the best ones by hand.