Software Workshop: Using Smart Objects To Process Raw Files
Use Smart Objects to combine the power of Photoshop with the versatility of RAW

Smart Objects were intro-duced in Adobe Photoshop CS4 as a way to bring more non-destructive editing into the pixel-based application.
Smart Objects live on special Smart Object layers and allow you to make certain kinds of edits to your layers without perm-anently changing the layers’ original pixels. Smart Objects let you open a RAW file in Photoshop and do things like copy, paste, transform, and resize as if it’s a normal pixel layer. But you can still go back and reconvert if necessary, using all of the tools in Adobe Camera Raw, without losing your changes.
When a Layer is a Smart Object, you have access only to some of Photoshop’s tools and filters. When you use a filter on a Smart Object, it becomes an editable Smart Filter. Note that you can also convert normal pixel layers to Smart Objects, allowing you to shrink and enlarge them without loss of image quality.
One of our favorite ways to use Smart Objects is with RAW files. When you open a RAW file as a Smart Object in Photoshop, you can always reopen it in ACR to reprocess according to your needs. And although these days the targeted adjustment tools in Lightroom 4 and ACR are pretty good, sometimes it just works better to use Photoshop’s powerful selection tools to edit specific areas.
Here’s how to combine Smart Objects and a RAW file to create an image with the widest possible range of tones.
Step 1
First, Process your RAW file for the most prevalent tones in your image—in this case the midtones. Working in Lightroom, right click on your image and choose Edit In > Open as a Smart Object in Photoshop. If you’re converting in Adobe Camera Raw, hold down the Shift key and click on the Open Image button to open as a Smart Object. Once in Photoshop, check out the layer thumbnail for your RAW file—you’ll see a small icon in the bottom-right corner that indicates that the file is a Smart Object.
Step 2
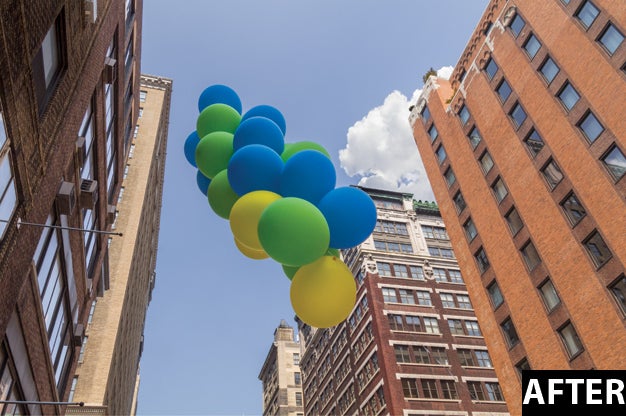
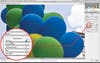
In this image, the balloons are backlit and underexposed, so target them first. Begin by making a copy of the first layer. Go to Layer > Smart Objects > New Smart Object via Copy. Making a copy using this method means that each of your RAW Smart Object layers can be converted differently. If you made a copy of a Smart Object layer the usual way, each copy would link back to a single RAW conversion.
Step 3
Now make a selection of the balloons. Since they’re pretty clearly defined, type W to grab the Quick Selection tool and make a rough selection; hit Q to switch to Quick Mask mode to use the Brush tool to perfect it, then smooth it with Refine Edge. (Or use your favorite selection method.) Add a mask by clicking the Mask button in the bottom of the Layers panel.
Step 4
With everything in your image but the balloons masked out, it’s time to reconvert your RAW file. Double click on the layer thumbnail with your new mask, and ACR will open up. Now reprocess your image with just the balloons in mind—don’t pay attention to the rest. Upping the exposure on the balloons brings out a lot of noise. Since you’re in ACR, you can tone down the noise using ACR’s noise-reduction tools, which work better than those in Photoshop. Click OK to go back to Photoshop.
Final Step
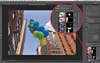
Repeat Steps 2–4 for every area of the image that you want to edit selectively. Fix the dark buildings on the left, darken the sky, and add definition to the clouds using more RAW Smart Objects. If you need to, go back and edit each RAW conversion to balance all of your picture’s elements, and adjust the opacity of your individual layers. This technique is very powerful, but you may want to save it for your most important images, not only because it takes patience, but because it takes lots of processing power; depending on the speed of your computer, you may have to wait a bit for the machine to catch up with your work.