Software Workshop: Master Lightroom 4’s Local Adjustments
Use Adobe Lightroom's selective adjustments for tonal control
In last month’s review of Adobe Photoshop CS6, we stated that it is becoming less relevant to photographers. One big reason: Photoshop Lightroom 4’s greatly enhanced ability to transform images on its own, through a much cleanier and easier-to-navigate interface than you get in Adobe Camera Raw, which offers the same tools.
Lightroom allows selective adjustments using the Adjustment Brush tool, and, with version 4, even white balance can be brushed on. This means you can easily correct mixed lighting to make it match, or paint on different zones of white balance for creative effect.
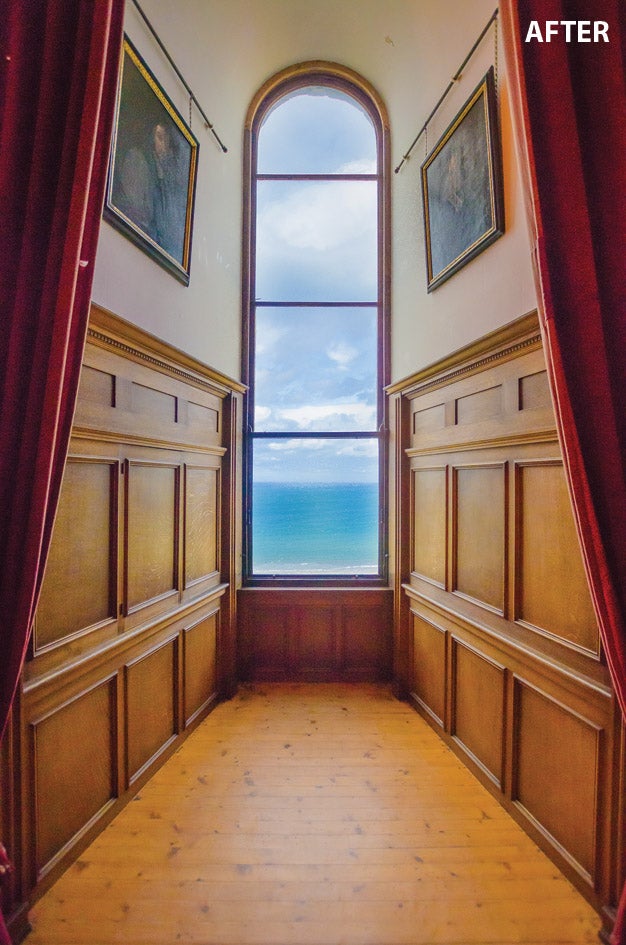
This photograph, taken by Andrew Wood in Bamburg Castle, Northumberland, England, nicely illustrates the power of both selective adjustments and Adobe’s new Camera Raw processing engine. Wood originally produced his final version of this picture by combining three exposures to make a high-dynamic-range (HDR) image, but we were able to take it this far using selective adjustments and just one of his exposures.
Here’s how to use Lightroom 4 to work multiple zones of your image and create a final RAW conversion that really sings. No Photoshop—or layers—required.
Step 1
Before you go local with your adjustments, start global and do a basic conversion. Adjust white balance and exposure, and decide whether or not to use a built-in lens profile. This exposure is very dark, but it has the best highlight detail of the three the photographer shot for the original HDR image. Bring back as much shadow detail as possible, then use the color and luminance noise reduction tools to make the image usable.
Step 2
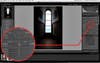
Click on the Adjustment Brush icon to get started. Then use the Effect pulldown menu to choose the adjustment you want to apply. More detail is needed in the window’s view, so choose Exposure. Then set up your brush: Check the box for Auto Mask to allow Lightroom to help you keep within your edges.
Step 3

Mouse over your image and use the left and right bracket keys to make your brush larger or smaller according to the area you’re working on, then paint in your effect. Moving the sliders before you paint on an adjustment can be a bit of a guessing game. So go with the default, then, after painting, readjust the Exposure slider to further decrease the exposure in the window’s view. If the location of the adjustment you painted isn’t right, erase some of it by clicking on Erase in the Brush menu and paint out the adjustment where it doesn’t belong.
Step 4
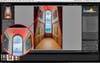
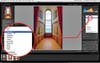
More adjustments are necessary in this image: The curtains are too bright, the paintings on the wall could use some dimming, and there are some color shifts on the ceiling that can be fixed with selective white balance adjustment. To start repairing them, click the New button to add a new adjustment point. Follow the same procedure: Use the pulldown menu to choose your effect, paint it in, and adjust the slider. To go back and edit any of the areas, click on its corresponding gray dot. Note that clicking on your adjustment point shows you a red preview of its location.
Final Step
Once you’ve added all the local adjustments you want, you may find that the final product needs further global tweaking. In this case, all the evening out of exposure has left the image a little flat. Edge up the Clarity and Vibrance sliders to make it pop.