Tips From a Pro: Shoot Better Food Photos With Any Camera
Jeff Kauck shares strategies for great food shots, even if you only have your iPhone
Jeff Kauck has been photographing food for magazines, cookbooks and advertising clients for more than twenty years. He has a strong fine art background with classical training in watercolors, which has helped define his style. Here he shares some tips for getting the best possible food photos whether you’re shooting with natural light, artificial light, or even Instagram.
What is the prep process like for the typical food shot?
It depends on which industry I’m shooting for: editorial (magazine and cookbooks) or the advertising industry.
If the shoot is for editorial, I’ll start out by going over a recipe with a chef, as well as reviewing the plates and silverware and anything else that might go into the set. The chef then cooks it, plates it, and hands you the food piping hot and you take the picture.
If the shoot is for advertising, it’s similar, but there are some differences. There will be a recipe and a layout ahead of time, just like with editorial, but you’ll do what they call a “stand in shot,” which is sort of a dry run. This allows you to fit things with a little more precision and get things exactly the way the client wants them. Then you move onto what is referred to as the “hero photo,” with all of the refinements made.
Do you normally shoot with natural light or controlled light?
I almost always use natural light when shooting for editorial or cookbooks. The goal is to make the scene look like it’s actually happening. In advertising, the food needs to look the same at the beginning of the day as it does at the end. Obviously dalylight doesn’t offer you that option, so you need strobes.
My inspiration for light is always nature. Studying painting was a great help for me because I studied watercolor and when using watercolor, there is no such thing a white paint, you have to leave the white paper. So you’re painting with the midtones up into the highlights and that’s the way I light.
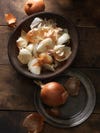
What are some tips for maximizing natural light?
People tend to shoot using daylight from a window as it is. But you can still actually control the light by filling it in with a reflector or changing the distance from the source. By reducing the size of the window, you get to a smaller light source which gives you a lot more control of the shape of your light. You can also use cards to block the light from certain angles to shape the light.
When shooting with natural light, what times of day are you looking for?
If the shot is just atmospheric, I would prefer to shoot first light or last light. I prefer first light as I find the light to be a little cleaner. If I’m actually shooting food, it’s not so much the time of day, but more the direction of the window and north light is the best light. Typically from 2pm to 3pm you’ll have great northern hemisphere light, especially by me in the Chicago area.
How many lights do you normally shoot with when you are using strobes?
One, always. Nature is the best light source in the world, and you have only one sun, and one sky.
How do you make light from a strobe look natural?
If you are in your house with your shot set up, instead of aiming your strobe light at the food, aim it at the wall where the window is—doing this will result in a much softer light that is similar in quality to daylight.
You can also take the diffuser off of your flash so its bare-bulb, and just shoot it at the wall or into the corner of the room and just let the light mix. Let it do what it does and let it come back at you. It can be beautiful like daylight.
How do you pick the proper angle from which to shoot? How can you tell when you’re too low or high?
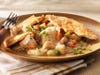
Often, you want to simulate the angle you’d have if you were actually eating the food. You want the viewer to feel like they’re sitting at the table in front of the food because it’s a view people are very comfortable seeing.
There are trends when it comes to this sort of thing, though. Right now everyone is shooting everything overhead and graphic. A lot of it has to do with the discussion between the art directors and the designers to find out what they are looking for.
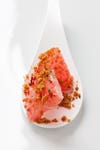
**Depth of field is crucial in food photography. Can you talk a little about how you choose what should be in focus and how deep the focus should be? **
Editorial has a tendency to mimic more of what your eye sees, so the focus is a bit more selective. A couple of years ago, people were shooting with really extreme open apertures, like f/1.8 . But they’re not doing that too much anymore.
In advertising, there is what’s called “visual priority.” When you’re shooting a commercial assignment, is to prominently feature the products strengths. Part of it is lighting, but you also have to decide where you want them to stop and stare. That should be the sharpest part of the photograph.
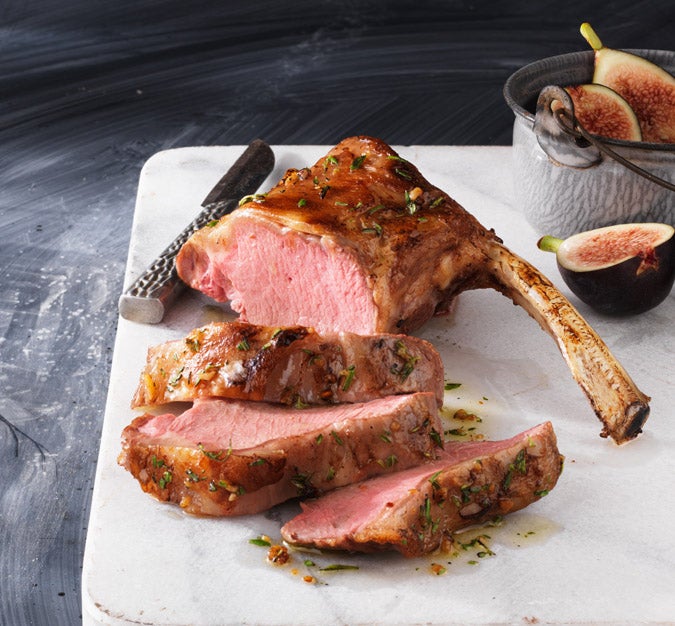
What is your typical aperture range?
In editorial I’ll run anywhere from f/8 to f/16, in advertising almost always f/16 or f/22.
What are you looking for when deciding a background for your images?
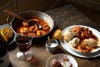
In editorial, usually, you’re trying to convey the look and feel of a restaurant or the look and feel of what the article is about. If you’re shooting for Martha Stewart and the article is about spring, you want light, bright, springy colors. Or if its fall, you’ll go for a darker richer feel. Basically, if the food weren’t in the photograph, does the environment give away what the story is about?
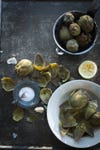
What are some photogenic foods for beginners to start with?
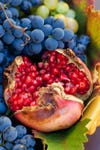
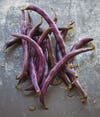
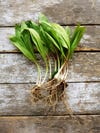
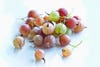
Stable foods. Bread and butter, or bread and jam, coffee or tea, potatoes, pastas can be easy, but sometimes the sauce can get a little crazy on you. Cookies or desserts can be easy. Obviously avoid foods like ice cream or salads. Salads start to fall very quickly. Vegetables out of the garden are always a good bet—beans, tomatoes, apples—you can do beautiful work with those and they’re really isn’t much to prepare, just clean them up and shoot.
What are some common mistakes new food photographers make?
There is a tendency to want to do foods that are too difficult at first. When you are doing a commercial shoot, usually you have a chef or a food stylist preparing the dish. If you are learning how to be a food photographer, and you’re learning how to be a chef, and you’re learning how to be a stylist, you are going to have a tough time.
I recommend beginners always start out shooting daylight before they get into strobe lights. Strobes haves a tendency to start looking very mechanical very quickly. Using on-camera flash is a mistake to me, too. Turn it off under all circumstances. That’s probably the number one mistake.
There are a lot of food bloggers out there doing nice work and there are endless magazines and website for inspiration. So look around and get a feel for the kind of styles that are out there.
Food photography has become quite popular amongst the masses thanks to Instagram. What advice would you offer to someone shooting strictly with an iphone?
Those cameras are so amazing. The thing that I would always make sure of is asking yourself, is this an appetizing photograph? Food photography can get overly graphic or overly simple or this or that, the important thing is that you never loose that appetizing quality. Go ahead and Instagram it or shoot it with lights, either way, the question is, does it make your stomach growl? That’s what I think is really important.
See more of Jeff’s work on his Website.