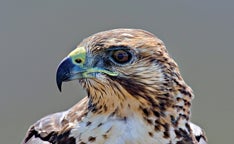
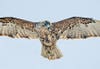
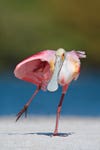
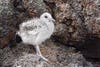
Galápagos hawk captured with a handheld Canon EOS- 1D Mark III and 70– 200mm f/4L Canon EF IS lens; 1/400 sec at f/7.1 (+1.7 EV over the meter), ISO 400. Arthur MorrisMorris shot this spoonbill with a tripodmounted Canon EOS-1D Mark III and 800mm f/5.6L Canon EF IS lens with 1.4X EF II teleconverter; 1/1000 sec at f/10 (+0.3 EV), ISO 400. Arthur MorrisSwallowtailed gull chick, cropped, shot handheld with EOS 50D and 70–200mm f/4L Canon EF IS lens; 1/400 sec at f/8, ISO 400. Arthur MorrisA handheld EOS-1D Mark III with 70–200 f/4L Canon EF IS lens was used to grab this gannet chick; 1/250 sec at f/5.6 (+1.3 EV), ISO 400. Arthur Morris
bird photo of the day jan. 25
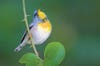
Northern parula warbler, captured with tripodsteadied EOS-1D Mark III and 800mm f/5.6L Canon EF IS lens with 25mm extension tube for closer focus; 1/100 sec at f/5.6 (+0.3 EV), plus –2 EV fill from accessory flash.
Getting Great Shots In Harsh Light Top
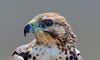
Arthur Morris knew that the highlights on this Galápagos hawk would be too hot, so he reduced exposure by 1/3 EV from the reading on his tripodmounted Canon EOS-1D Mark III. Exposure through an 800mm f/5.6L Canon IS lens with Canon EF 1.4X II teleconverter: 1/250 sec at f/13, ISO 400.