The Best Services for Printing Your Photo Books
We sampled 10 of the most popular companies, see which ones provided the best overall experience.
We may earn revenue from the products available on this page and participate in affiliate programs. Learn more ›
__Custom-printed photo books really show off your pictures, and they’re easier than ever to design and make. We tried out 10 of the biggest photo book services to give you a taste of what they can do, and gathered our most useful tips and tricks, all to help you create the most impressive volume possible. Please note that we orderred our books in the summer of 2010—companies may have revised their products, creation software, and prices since then._
_
There’s plenty of competition for your book business, whether the services are attached to online photo labs, such as Kodak Gallery, or offered by companies such as Blurb that are dedicated to books, or built into your photo software (e.g., Apple’s Aperture).
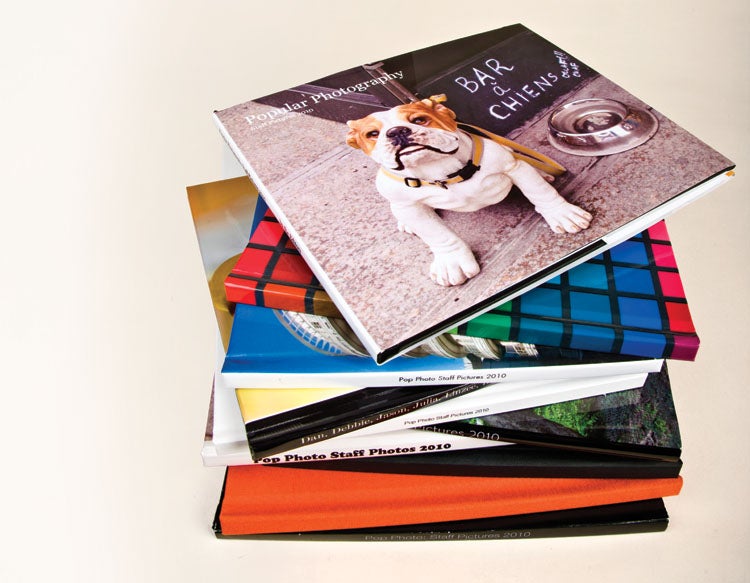
We sent our staff’s own pictures to 10 of the biggest photo book services, ordering a range of sizes, paper stock, and cover types. Some had easy software, some had great print quality, others had nice layouts. Because we believe that a clean design shows off photographs best, we attempted in all cases to make that kind of book—and were frustrated if we had trouble avoiding graphic-themed backgrounds and cutesy frames and corners.
Read on for tips for making the best book, or check out our table at the bottom to see how each of the 10 services compared.
What to Look For
Photo books seem simple to make, but you’ll face a surprising number of options in choosing a service and creating a book.
Take paper type. Most companies use just one kind of paper, but some—Blurb and Mpix, among them—give you choices. Adorama and Mpix each offer heavy photo paper (Adorama’s is Fuji Crystal Archive), whereas the others use a range of stocks, all with some degree of glossiness. Kodak’s had a slight tooth. Our Mpix book, which we ordered printed on pearl paper, had both a tooth and a slightly metallic, iridescent sheen.
Covers, too, present options. Mpix offers a “suede” cover that turned out to be a smooth, matte paper rather than the leather (or even sueded cloth) we expected, but it did have elegant, classic foil stamping on the front.
If you want a dust jacket, your choices are more limited: Only four of the services allowed them. Most had more modern-looking image-printed covers; Aperture’s service was the only one to offer both simultaneously. For a premium, you can get leather covers (we didn’t). The least expensive type, in general, is the linen cover with a window cut out to reveal the first page.
Spine text may also be important to tell you what’s inside that book on your shelf, but not all services and formats afford that option. With linen covers, or with Mpix’s sueded paper, forget it. Dust jackets, on the other hand, usually include spine text. Among books with image-printed covers, only Kodak’s lacks spine text.
Few people give much thought to endpapers (the lining of the covers). But beautiful endpapers are the gateway to a beautiful book—cheap (or absent) endpapers seem chintzy. So we were disappointed that the Snapfish book lacked them altogether. The best? Aperture’s, which were heavy and heather gray. MyPublisher added attractive vellum sheets. The lay-flat photo-paper books by SmileBooks and Adorama also lacked endpapers, but this seems due to the way they’re bound. SmileBooks left that first page blank, but our order number showed through. Adorama printed images inside the front and back covers.
Hardcover sizes vary, from Adorama’s small, 6×4-inch book to large 12-inch square from Adorama, Blurb, and SmileBooks.
Most services charge a set price for the first 20 or so pages, then add a dollar per page after that. Blurb goes by range, starting with up to 40 pages, and going up in increments of 40 more. In book publishing, two pages equals a single sheet of paper: a 20-page book will have 10 sheets of paper, plus the endpapers, and is therefore surprisingly thin.
Almost all of these services offer deals and promotions, and with some quick internet research we dug up promo codes to save up to an average of 20% off on many of the books we ordered.
Design Tips
To speed up the process, tightly edit your images before you begin. When you choose your pictures, think about the story and elect a variety of types—mix landscapes, portraits, and details. For a bigger book, group your pictures into themes. The longer your book, the more structure it will need.
We prefer simple layouts to emphasize the images, and most services had options like that, though they were not always easy to find. Aperture, MyPublisher, and Blurb had the most modern and elegant designs. Services associated with photo-sharing sites, such as Snapfish, Shutterfly, and Kodak Gallery, were more biased toward themes for occasions like a new baby, wedding, or holiday. Picaboo is oriented to digital scrapbookers, offers thousands of backgrounds, and an active community shares designs. With Picaboo and Mpix, it was difficult to get a simple look.
The most common book shape is a horizontal rectangle. If you shoot mostly horizontals, this is the best choice. Go for a more extreme rectangle if you plan to print images right out of your DSLR—you’ll be able to make full-page images without cropping much. Square books can be nice to hold, but you won’t be able to print a full-page picture without cropping—they’re slightly better suited for a 4:3 aspect ratio. If you have mostly verticals, your options are more limited—only Adorama and Mpix offer vertical books.
Click Here to View This Chart Full Screen
Prepare Your Images
A bit of prep is usually necessary before uploading. As always, don’t correct color and contrast without calibrating your monitor. Most important, save your images in the sRGB color space before uploading! Many services won’t convert them for you, and if you upload in Adobe RGB or other space, your pictures could print flat and dull. Blurb provides an ICC profile, but states that color is extremely difficult to control in this kind of printing situation. We found that to be true—we printed the same images, along with a GretagMacbeth Color Checker chart, in nearly every book, and received a range of results.
Some services, like Kodak’s, automatically perform some corrections, adding what looks like contrast, sharpness, and possibly some color correction—we were extremely pleased with its results.
In most cases, save high-quality JPEGs before upload. Aperture and MyPublisher also accept RAW and TIFF files; Adorama accepts TIFFs as well as JPEGs.
Working in the Software
To make a book, you must design the page layouts, a process made easier (to varying degrees) by the company’s software. All the services do it one of three ways: via online software, proprietary downloadable software, or within an image-editing program.
The easiest one to use, and the one that worked the fastest, was the one inside our Aperture software. We found no noticeable processing delay dragging images into the layouts, and easily switched between different image configurations. If we didn’t like the way an image looked, we were able to edit it inside the program. Because we could use the software’s built-in tools, such as mechanisms for collecting a group of images, it was the best creation experience of the bunch. (Other software programs have book-creation inside, and the new Adobe Photoshop Elements 9 will have an improved one, which we look forward to trying.)
Blurb, MyPublisher, and Picaboo provide software for free download. Blurb’s and MyPublisher’s are both faster than online options, and both make it easy to grab images from your hard drive and add them to a book.
MyPublisher’s was particularly fun to use—it zooms in to the area you’re working on, and allows you to use any font on your system.
Online creation software was, on the whole, clunkier. To use it, you first must upload your images, so it’s important to edit your pictures well—forget some, and you’ll have to go back to your hard drive and get them. Most online software allows you to save as you go, and this is important—if your browser crashes, you could lose everything you did.
Of the online software, Adorama’s was one of the most sophisticated, allowing you to readily resize picture boxes, add drop shadows and text boxes, and even undo your last command—a function that’s missing on many online programs. Software aimed at novices can be more frustrating. With Mpix, you couldn’t add or get rid of borders for the whole book at once; you had drag and drop the borders one by one onto your images. Snapfish made it hard to edit individual photos, requiring you to click through a succession of screens to do so. Many of the services will automatically populate your pages, with varying degrees of success. Both Picaboo and Shutterfly allow you to drag and drop to group pictures together, then automatically create layouts to suit your image combinations. Kodak’s SmartFit did a good job with autofill because it seemed to respect both the order of our images and their aspect ratios. Mpix’s autofill, however, seemed to respect neither.
If this all seems like too much work, consider SmileBooks. We used its design service both to edit and to compile our books—a designer at the company followed our instructions, choosing our best images and designing the book for us. You’re charged for the design only if you order the book, and SmileBooks will make revisions according to your requests. The full-service process is much pricier than designing the book yourself, but it’s a good option for those with more money than time.
Our Conclusions
We’d hoped to find a clear winner, but, while there were standouts, no one company excelled at everything from book creation to binding to print quality.
Aperture was one of the best, with a simple creation process and a great binding. Kodak’s print quality beat all the books with traditional paper. And Adorama is up there, with good software and beautifully printed images. MyPublisher did well all-around, too.
If you don’t mind the digital-print look, which shows screening dots on close inspection, Aperture, Blurb, and MyPublisher give you the best layouts and the best design experiences. If you like lay-flat pages, and don’t mind a lack of endpapers, Adorama will make a book that shows off your images.
But for a traditional book, it’s worth muddling through Kodak’s software and giving up spine text and a dust jacket in exchange for such beautifully printed images. We would love it if Kodak created a higher-end version for enthusiasts, complete with downloadable software and lots of cover options.
The good news, though, is that many of these services produce good books, and we’ve found that people almost universally love seeing their images printed and bound. Spend an hour or so making a book, and you’ll be able to enjoy your images for years.