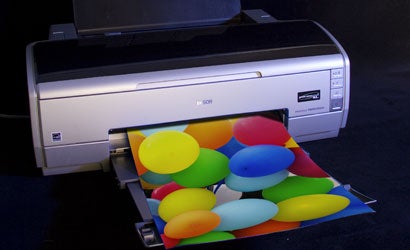
Inkjet Printing 2.0
Get your photos off the screen and onto the wall. Just follow these seven simple steps to perfect prints.
If you think you need to make six prints to get one you like … if you’ve accepted the fact that your prints are always a little yellower than your screen … if you assume that trying to get them not only to match your screen but also look sharp and color-accurate would take a lot more than an afternoon’s work … then you’re thinking old school.
Why? Because setting up a color-managed workflow has become so easy, any photographer would be crazy not to do it.
If all you want is accurate prints, you can forget all but Step 1 of this story, because these days autopilot works pretty well. But if you want to make the most of your camera, computer, and printer — without hassles — keep reading.
The problem with letting your devices and software take control? They assume you want to work in the inferior sRGB color space, which means that even though your camera can capture a wider variety of colors and your printer can print a wider variety of colors, you’d rather throw them away for the sake of saving yourself a few mouse-clicks.
To show you how to control color, we’re using Adobe Photoshop CS3, Epson’s Stylus Photo R2400 printer, the Pantone Huey PRO for calibration, and Windows XP. The basic principles are the same no matter what your system, so if this story doesn’t answer all your questions, a few Google searches will.
Step 1: Calibrate and Profile your Monitor
The gizmos that you attach to your screen to make sure it displays standard brightness, contrast, and color have evolved more than any step in the color management process. These days, you pick one (we used the Huey PRO, but you can also try X-rite’s eye-one display LT, ColorVision’s Spyder3Pro, or numerous others), install the easy-to-use software, plug the measuring device into your USB port, and go. You really don’t need to know much of anything to use it, and when you’re done, you’ll be amazed how much closer your prints already are to your screen.
Tips: Some software will ask you which white point you want. If so, choose D65 (sometimes called 6500K). • Some software will ask you to pick the gamma. The PC’s default is 2.2, but if you can, go for the less contrasty 1.8.
Step 2: Tell Your Camera and Software You’re in Charge
Since you’ll be managing your color in your printing process for the sake of getting better, more accurate tones, make sure you’re capturing those colors in the first place.
Dig out your manual or just scroll through your camera’s menus until you find the option for Color Space, and choose Adobe RGB. That space, of course, will apply only to your JPEGs. When you’re converting from RAW, make sure you set the output file to be Adobe RGB, as well.
Then set up Photoshop to keep all the colors that you shot. Go to Edit > Color Settings (see the screenshot, above). Choose Adobe RGB (1998) as your working space, and in Color Management Policies, choose Convert to Working RGB and check those three boxes. This ensures that, on the off-chance you want to open a photo someone e-mailed you, Photoshop will ask what to do with that sRGB file. (You should convert that e-mailed image so it will fit nicely into your workflow.)
Step 3: Install Your Printer’s Profiles
Every paper has its own characteristics and way of relating to your printer. Each printer/paper combination has its own profile, and before you print, you’ll have to tell your system which profile to use. And before you do that, you have to make sure those profiles are installed.
Boy, this used to be one big pain in the neck. Thankfully, it’s much easier now. On the Epson 2400’s installation CD, there’s a button for Install Profiles. It takes you directly to Epson’s website, where you download an installer for your printer and the latest profiles are automatically stuck in the right spot.
Of course, Epson gives you profiles only for its own papers. So if you want to print on paper made by another company, you’ll have to download the profiles that paper manufacturer made for your printer. Many paper manufacturers post profiles for a variety of popular printers on their websites. Once you download them, you may have to manually place them in Windows’ profile folder so that, once in Photoshop, you can access them. The obscurely located folder: C:WINDOWSsystem32spooldriverscolor.
Step 4: Preview Your Print
Photoshop can simulate, to a good degree of accuracy, what your print will look like. This version looks flatter and duller than what you see by default on screen, but previewing it will let you make adjustments before you send it through the printer. Most often, you’ll need to add a little contrast and maybe some saturation.
To set up what’s known as soft-proofing, open your image in Photoshop and go to View > Proof Setup > Custom. Under Device to Simulate, choose the profile for the printer and paper you’re using. If you’ve got the Epson 2400 and you’re printing on Premium Luster paper, for example, use the pull-down menu to scroll down and select the profile called SPR2400 PremLuster BstPhoto.icc. Don’t forget to check Simulate Paper Color. The screenshot above shows how the window looks.
Step 5: Get the Resolution Right
The trick to setting your image size for print is to change the Document Size, not the Pixel Dimensions. Rather than trying for a specific number (say, 300 pixels per inch), go to Image > Image Size, and make sure Resample Image is unchecked. Then type in the document size, and let the resolution fall where it may.
If, however, you’re making extra-large prints, and the resolution winds up below 200 ppi, you might end up with fuzzy details. Upsampling programs such as onOne’s Genuine Fractals can help overcome that problem.
Step 6: Sharpen!
We always warn about the dangers of over-sharpening, but under-sharpening has perils, too. The best trick we know: Before you sharpen, zoom out.
Why? Because an average LCD monitor might be able to display about 100 ppi, but that’s 1/3 of the resolution at 300 ppi and 1/4 if your resolution is at 480 ppi. Do your sharpening at 25%. Your picture may look terrible on your screen at 100%, but it will look fantastic when it emerges from your printer.
Go to Filter > Sharpen > Smart Sharpen, and use the pull-down menu to choose Remove > Lens Blur. Generally, a low Radius and high Amount are good for digital photos. Zoom your preview down to 25% to match your image.
To avoid sharpening noise and making it more obvious, you may want to work on a duplicate layer so you can mask off sharpening in big swathes that you want to keep smooth, such as skin or cloudless skies.
| Pick a Price A great printer doesn’t have to be expensive. Yes, you get what you pay for, but all of these turn out wow-caliber prints. • $770 We used Epson’s Stylus Photo R2400 here to show how easy high-quality printing can be. And it has a lot to offer, including an ability to generate gorgeous, long-lasting, 13×19-inch prints from its eight UltraChrome K3 inks. It also makes borderless panoramic prints up to 13×44 inches from roll media, and packs an unbeatable software driver for producing nearly perfect b&w prints from your color images.• $560 A couple hundred less buys the 8-color Hewlett-Packard Photosmart Pro B9180, which can match the R2400 for sheet print size (borderless 13×19) and display longevity, plus it includes a network connector. But it’s slower, doesn’t handle roll media, and b&w prints take tweaking to remove color casts.• $420 For speed and quality, the Canon Pixma Pro9000 is hard to beat. Get 13×19-inch borderless prints in just 2 min, 27 sec. Its second paper path handles thick matte papers, canvas, and fine-art cut sheets up to 14×17 inches. For b&w there’s an advanced grayscale print driver. Prints may not last as long on display as those from the Epson and HP, but you’ll get outstanding color gamut and quality.• $299 Short on space and budget? Produce prints up to 8.5×14 inches with Kodak’s EasyShare 5500 All-in-One printer, fax, and copier. Even with its twin-cartridge, 4-color ink system (with additional clear overcoat and text black) you’ll get long-lasting prints that rival those from pricier units (assuming you use Kodak’s 4- or 5-star premium paper). It has a multi-card reader, 2.4-inch LCD, and 35-sheet auto-feeder for scanning documents and photos. — Michael J. McNamara |
Step 7: Check a Lot of Boxes, and Then Print
This is the only step that is still a bit tricky, if only because there are so many little things to do.
Go to File > Print. Then head straight for Page Setup, and choose Advanced. To avoid having to choose the Advanced button every time, check the box, labeled “Show this screen first,” in the lower right. Under Paper & Quality Options, choose your paper type, size, and Best Photo. Of course, choose your orientation. Then, in the Color Management section, choose ICM.
A box will appear below labeled Off (No Color Adjustment). This box is key. It may seem counterintuitive, but you want to check it in order to stop the printer from competing with Photoshop’s color management system.
Then, in the bottom left, click the button for Save Setting. Name the setting after your paper type and size, so that the next time you’ll be able to choose it without having to check all of those boxes again. Click OK.
Now turn to the right half of Photoshop’s print dialog box. Under Color Handling, choose Photoshop Manages Colors. Then, pick your printer profile. In this case, we’re printing on Matte paper, and we’ve got it set to Best Photo, so we’ll choose SPR2400 MtteHvyWt BstPhoto.icc. One day, perhaps, these profiles will have clearer names. For now you have to decode them yourself.
Then just hit Print. If you want to double-check that you’ve turned color management off and selected the right orientation and paper, you can click Preferences to see those options again. Otherwise, just hit Print again and watch as your photo emerges just as you imagined it.