Tips From a Pro: B/W Wildlife Photography
Want to set your photography apart from the crowd and get images that can be even more compelling? Lose the color!
Think “wildlife” and you’ll likely think “color”—vivid plumage, multitone fur, brilliant scales, all against backdrops of verdant green and sky blue. So naturally everyone shoots wildlife in color. It’s all the rage these days—particularly in nature shooting—to crank up color saturation to make photos stand out. But while vivid colors certainly catch the eye, sometimes taking the saturation in the other direction can have just as much, if not more, impact.
When you drain the color from an image, it allows the eye to focus on form, textures, shapes, and composition. With wildlife photography, you can use monochrome to highlight the patterns of an animal’s fur or the textures of its skin, and to turn a distracting background into a neutral gray. Probably the biggest advantage of black-and-white is that it gives you a far greater leeway for exploring tonality. Viewers have certain expectations, for example, of how intense or what shade of yellow a lion should be. But in a monochrome image, you gain the freedom to choose to render the lion in high-key, or brooding dark, or anywhere in between, without making it appear as a grand departure from reality.
Years ago, when color film came onto the scene, black-and-white imaging began to fade in popularity—especially in wildlife photography, with its emphasis on naturalism. But monochrome has returned with a vengeance with the advent of digital. The digital camera’s most powerful tool here is RAW capture, a format that allows you to “develop” images in a wide variety of color palettes—or with no color at all—from the same file.
Seeing in B&W
So many times I hear people say, “The image didn’t work in color, so I tried it in black-and-white.” This tactic can sometimes salvage an image, but to create successful b&w images consistently, you need to learn what to look for.
Contrast is a major force behind black-and-white imagery. A bright animal on a dark background is an obvious choice, but also look for color contrasts that can be taken advantage of in conversion. Take, for example, the cheetah image on this page. The cheetah was yellow and among some green grasses; in conversion, I was able to push the grasses darker and the cheetah lighter, though in reality they were relatively the same luminosity. This left a moodier image than the reality—an afternoon shot with lackluster light.
Which brings up another advantage of b&w: You can shoot longer in the day. Because additional contrast usually improves a monochrome image, successful captures can be taken well outside the “golden hour.” Shadows or strong sidelight can be used in composition to emphasize the shape of an animal.
Underexpose a bit with backlighting to highlight the outline of a furry creature, or go the other direction and overexpose a portrait for a high-key effect. For the giraffe on page 108, for example, I positioned myself so that a cloud was behind it, and overexposed by 1.33 stop in order to blow out the sky for a studio portrait look. This graphic approach works very well in b&w and allows you to shoot in conditions that may never work in color—the eye is more forgiving of blown highlights in b&w than in color, where they can really distract.
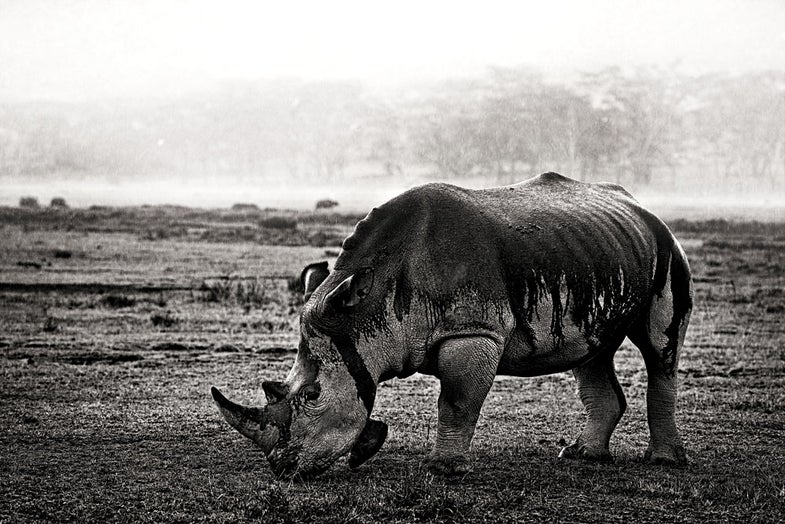
Textures can also be emphasized through b&w. The rhino on the opening spread is a perfect example: Naturally dull in color, it’s already on its way to a monochrome image. By increasing I contrast, I was able to enhance the detail in the hide, and the repeating lines of the ribs. I was also able to emphasize the tonal difference between the rain-soaked areas and those that were still dry. The bright background shrouded in rain also enhanced the image’s mood in b&w, whereas in color it looked lifeless and washed out.
The patterns of the zebras at right were also brought out in conversion. Already monochrome, they were perfect candidates, but the background was a bright, distracting tan and green. The conversion allowed me to darken the background and highlight the dust being kicked up, allowing the high-contrast animals to really pop.
Shooting B&W
If you already have sufficient gear for shooting successful wildlife images in color, you have everything you need for b&w. And many of the same rules apply. You want your subject to stand out, so look for a complementary background, without clutter or distracting elements. You can most often achieve this through the use of long telephoto lenses, which limit the angle of view behind your subject. You can then fine-tune the background by moving yourself up, down, left, or right.
Another benefit of teles is the inherent lack of depth of field that comes with high magnification. A patchy, high-contrast background can be greatly smoothed out with a shallow focus on your subject, and can be evened out more with selective dodging and burning later on. For small creatures, a macro lens can be used for the same effect. While photographing the snake above right, I used a 180mm macro to isolate its head as it went through a sandy patch. An image of it in the grass may have worked well, but for me the simpler graphic image worked better. Without distracting blades of grass, it allowed smaller details, like the reflection in the eye and the flick of the tongue, to pop.
Sometimes, though, you’ll want more depth of field. Images of animals as nondominating features in a landscape usually benefit from a deeper focus. Imagine a deer in a field in front of a background of overlapping hills. Stopping down to a small aperture with a shorter tele (100–200mm) will compress and define those lines; converting to b&w will emphasize the repetition still more.
For optimal b&w images, shoot in RAW, which gives you much more tolerance and pixel information to work with in conversion. Most DSLRs allow you to simultaneously shoot RAW files and b&w JPEGs, with the monochrome appearing on the LCD. This can be beneficial when you’re starting out, or have trouble training your eye for b&w visualization. Couple that with live view, and you can see a world without color.
Processing B&W
Once you get your images onto the computer comes the fun of bringing them to life. While you can make b&w conversions in Adobe Camera Raw (ACR), I prefer Photoshop for its far greater range of options. (All the images here were converted to b&w in either Photoshop CS3 or CS4.)
While there are a number of ways to convert your files to b&w in Photoshop, I typically just use the Black & White layer, but often take an extra step and use the layer twice. I will first do a general b&w conversion, typically not pushing things too far, and then make a second b&w layer that will use masks to isolate certain areas of the image. This second layer allows me to work on multiple areas of the same color and render them as different luminosities. By masking out those areas of the first b&w layer, it allows the second conversion to come through.
Another tool I use for b&w work is the Hue/Saturation/Luminance tab while still in ACR. This allows me to push similar colors farther apart or closer together, as in the cheetah image (page 52). Even though the grasses were green and the cheetah yellow, I was not able to get the animal to pop as much as I wanted. So I went back and reconverted the RAW file, using the tab to push the grasses closer to blue and the cheetah closer to orange. Now, with the colors more opposite on the color spectrum, they separated into vastly different tones of gray in the b&w version.
Many Photoshop adjustments used for color images work for b&w images, as well. Typically, you want true blacks and whites in your image, and one of the easiest ways to do that is with Levels. Just squeeze the highlight and shadow sliders closer together to add some nice punch to the image. Curves is good method for midtone contrast. A simple S-curve makes a good start, and remember you can always use layers and masks to isolate the areas that it will affect.
Another favorite tool is a nondestructive dodge and burn layer. For this, make a new blank layer and change the Blend mode to Soft Light. Then paint directly on that layer with black or white; black darkens and white lightens. Start with a soft, low-opacity brush and build it up. You can do this twice, using one layer for dodging and one for burning.
This method works well for highlighting parts of the animals, emphasizing their shape, or altering the luminosity of your background to better suit your subject. I used it to get the effect of a black seamless in the baboon picture on page 54. I had taken the shot while she was sitting in front of a red wall at an abandoned resort hotel. In conversion, I darkened the background by turning down the red slider on a Black & White layer, and then further darkened it by burning in the wall.
One last thing I do is tone my images. I use the Photo Filter adjustment layer in Photoshop, click on the color square, then go to Color Libraries and type in “warm gray.” There are about 11 shades that I use to slightly tint my images, but there are many more options available to fit the mood of the image. A cool blue, for example, can emphasize the chill in a winter image.
I love color, but there is a timelessness to black-and-white that cannot be duplicated. The next time you are out shooting wildlife, make a conscious effort to see in black-and-white and watch how it transforms your photography.
Paul Marcellini is a landscape and wildlife photographer based in Miami, FL. He offers prints and tours of the Everglades. See more of his work at www.paulmarcellini.com
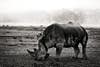
White Rhinoceros, Lake Nakuru National Park, Kenya
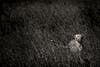
Cheetah, Masai Mara National Park, Kenya
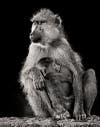
Yellow Baboon mother and baby, Amboseli National Park, Kenya

Zebras, Lake Nakuru National Park, Kenya

Black Racer Apalachicola National Forest, FL
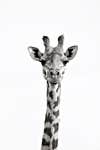
Giraffe, Masai Mara National Park, Kenya