How To: Make Great Pictures in Winter Weather
Don’t let your camera hibernate this winter, go out and shoot!
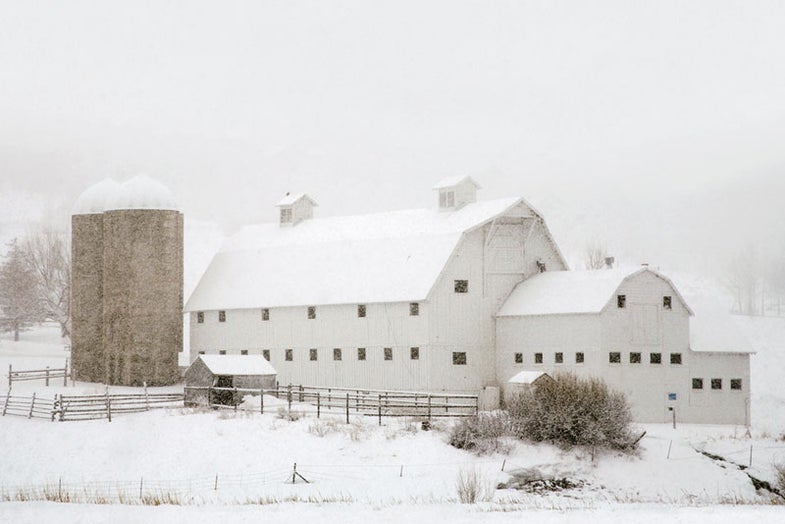
For landscape and scenic photographers, snowstorms bring a host of benefits you might not think of at first. They very effectively reduce visual clutter. Snow-covered ground can hide rocks, dirt, and weeds, and low clouds and falling snow blot out busy backgrounds. Foreground subjects can be isolated, standing out where they may have been camouflaged in a normal visual environment. With cloud cover, the lack of shadows also helps simplify a landscape.
These same factors can also emphasize depth, as objects become more obscured with distance until detail disappears, creating a suggestion of the infinite. The wetness of falling snow can intensify color, especially in rock. Look for deep color against the white for added drama.
Snowstorms provide another boon to digital photographers: flat light. This makes it easier to capture a full range of tones in the scene within the limited dynamic range of digital sensors. And you can always adjust contrast and brightness in postproduction for a different look—more on this below.
One further advantage of shooting during snowstorms? Most people stay indoors. I’ve spent time on the roads of the Uinta Mountains in Utah, where I didn’t see another soul for an hour or more. The only time this may be a disadvantage is if you get stuck and need help. That’s why it’s a good idea to keep provisions such as a shovel, tow rope, rock salt, blankets, flashlight, food and water, and even a change of clothes in your car.
When to Shoot:
Naturally, the middle of winter in snow country offers the most opportunities for this type of photography. The ground is more apt to be completely covered, hiding the clutter. Without leaves you see the skeletal structures of tree trunks and branches. The more snow, the simpler the landscape.
In many places, though, snow is a three-season event. When autumn creeps onto the scene, few landscapes are more vivid than brilliant fall color backed by fresh white snow—especially when sunlit. Spring snowstorms, on the other hand, provide a different atmosphere: new leaves droop beneath loads of white, and bright green provides a striking color contrast. Colorful spring flowers are also striking when poking through a layer of snow.
Spring and fall snowstorms often move faster than those in midwinter, giving a variety of lighting as the storm comes in, moves through, and exits a location. A small break in the clouds can allow sunshine to peek through, illuminating a small area in the scene, even while snow is still falling.
Exposure Tips:
At slow shutter speeds, snowflakes become streaks, a look you can use to your advantage. At exposures of 1 sec or more, you will get very long light streaks—or no trace of snow at all, depending on the weather and the brightness and texture of the background. I’ve shot photos during moderate storms in which it was hard to tell the snow was falling without enlarging the image many times.
Still, I prefer snowflakes to appear as dots rather than streaks—frozen in flight rather than blurred. A shutter speed of 1/250 sec usually does the trick; closer to 1/500 sec may be better for very fast-moving flakes. (Shutter speeds above that won’t make a difference.) Faster shutter speeds also allow you to shoot your camera handheld, which is more practical than using a tripod in foul weather. I do use a tripod on occasion—for instance for my photo of the flowing stream (first photo in the gallery).
Keep in mind that the spotmeter in your camera gives an exposure reading to render a subject a midtone. So if you meter off the snow itself, you’ll end up with an underexposed image (and gray snow). I usually manually spotmeter the snow and add about 1.5 stops of additional exposure.
With your camera set to centerweighted or evaluative metering, you can often get away with shooting on autoexposure, but take test shots to determine how much exposure compensation to add. The most accurate way to do this is to check the histogram. Make sure that the graph is pushed toward the high- light end of the scale (right-hand side), but does not spill over the edge, which indicates clipping of the highlights.
But shooting in fiat light can give you a muddy result, even with proper exposure. You can use the Levels tool in Adobe Photoshop or Photoshop Elements to spread the tonal range and bring back some life to most shots. If you need more contrast, use the Curves tool or the Brightness/Contrast sliders. You may even want to add a little color saturation with Hue/Saturation, but don’t overdo it. (See How To: Work with Curves for a primer on color and contrast.)
Pick Your Gear:
Focal length also affects the appearance of falling snow: With long lenses, you generally shoot through more snow because of the greater distance to the subject, creating a fine texture- screen effect. A wide-angle lens, which usually necessitates a closer proximity to your main subject, means you’ll get fewer flakes between your camera and subject—but more of them may be in focus due to increased depth of field.
So shoot more than one version of the same scene, and try different focal lengths, so you can choose an image that has the best snowflake effect. And be sure to take several frames of the same version, as a large snowflake close to the lens can obscure important detail—I learned this the hard way.
A zoom not only gives you this flexibility but it saves you from having to go inside to change lenses—a must to protect your camera from moisture. It also pays to use cameras and lenses with plenty of weathersealing, and to always use your lenshood and UV or skylight filter to protect the front element, as well as an umbrella to shield your gear.
Even better, stay in your car, if possible, and shoot with the window rolled down. Why get colder than you have to?
Bob Hills has had a long career in advertising photography—product, food, architecture, industrial, and more. For the past six years, he has concentrated on his first photographic love: landscape and fine art. He is represented by the Hill Gallery & Sculpture Park in Sandy, UT, and The Gallery at Clarke’s in Tropic, UT. See more at www.bobhills.com.
Blizzard01
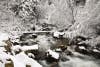
Bob Hills used a tripod to steady his Canon EOS 5D with 24–105mm f/4L Canon EF lens during a 0.3 sec exposure at f/22, ISO 100, a setting that blurred the moving water.
The white of the snow contrasts with the color in the damp rocks. Hills used his handheld EOS 5D with 70–200mm f/2.8L Canon EF IS lens for exposure of 1/125 sec at f/14, ISO 400. Bob Hills
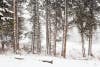
Snow-dotted trunks of a stand of lodgepole pines create stark subject matter, accentuated by falling snow and low clouds. Same handheld rig as previous image, 1/160 sec at f/20, ISO 400. Bob Hills

Snow encourages minimalism, as in this shot of windblown grasses. Same equipment as previous images, plus 2X tele-converter and tripod. Exposure, 1/160 at f/45, ISO 400. Bob Hills
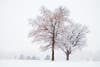
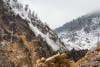
Trees stand out from the usually detailed background, their leaves offering a touch of color. Hills handheld a Canon EOS 5D and 28–135mm f/3.5–5.6 Canon EF IS lens, 1/320 sec at f/6.3, ISO 400. Bob Hills

The pattern of this bench was an “irresistible subject” for Hills, who handheld a 5D with 70– 200mm f/2.8L lens, 1/125 sec at f/11, ISO 400. Bob Hills